Make sure you download the source files so you can follow along.
You have now covered all the basics so should be able to build your own biped rig. So that’s the first section of this course complete and it only took seventeen videos to do it!
As we move into more advanced areas of rigging, I thought we would need a new creature to rig, something with a higher polygon count and that can be more geared towards film and TV rather than games. So I’m currently working on something special for you and I will post updates in the community feed.
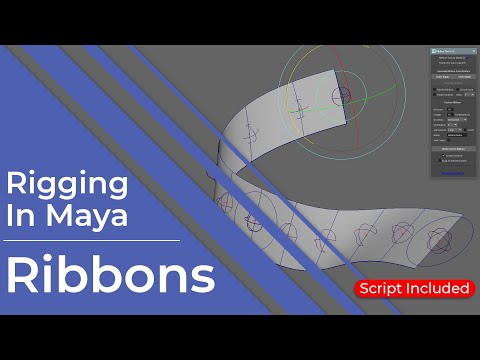
Before we begin rigging the new creature, I wanted to cover a key part of the rig, and that’s what’s known as the ribbon.
I will be using these a lot throughout the next section of this course so it made sense to dedicate this first video to them, that way I am not repeating myself and if you are unsure you can just refer back here.
I also have a nice surprise for you :)

Before you build any rig its important that you take some time to check the model you’re working with, while also making a plan of how to approach the rig itself.
So, in this video I want to talk through some key areas you need to check before you create your first joint. We will also come up with a plan of action for the canine model we will be rigging over the next series of videos.
We have the model ready to go so let’s start to look at building our quadruped rig.
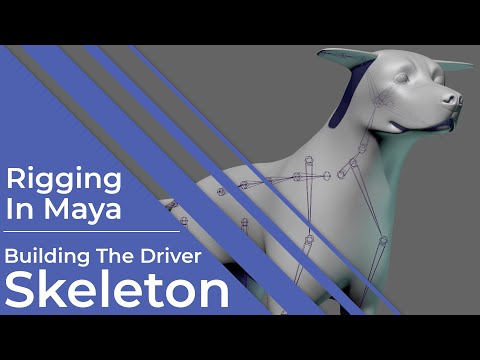
In this video we will investigate creating the driver #skeleton, but this won’t be used to directly effect the model.
Instead think of this as the actual bones of the dog, so these will instead drive other systems, so in this case it will be the ribbons. These will then act like the muscles which will in turn manipulate the skin.
Taking this approach will give us more flexibility with this rig, and make animation easier and more organic.

This video was originally going to cover adding the IK and FK controls into the limbs of our dog, but I decided to take another approach.
I’ve covered basic IK FK blending before, plus I recently released a video showing different quadruped rig configurations, so I didn’t want to just repeat myself and take you through things I’ve shown before.
If you would like to refer to those videos there are links in the description below.
As this is a more advanced section of rigging, I decided that I would instead introduce you to some scripting.
So, as well as building the IK FK legs, I will show you how to automate the process.
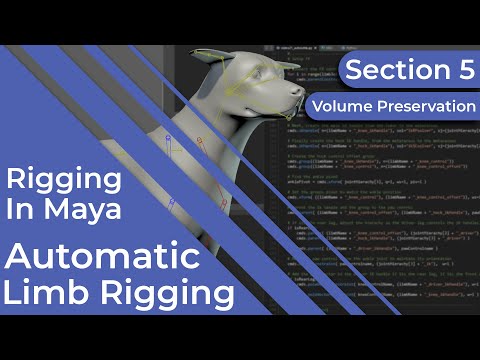
So, over the next few videos. you will essentially be creating your own #automatic limb rigging tool.

In the previous video we began writing a script which will automatically rig a #quadruped limb for us.
We’d got to the point where we’d created all the main joint chains, so let’s continue with that now as we add in the IK and FK functionality.
Because we are picking up directly from video twenty-one, I would highly recommend you go back and watch that tutorial before starting on this one.
In videos twenty-one and twenty two we created a script which will automatically rig our quadruped limbs. Now so far this is quite basic as it simply adds the IK and FK functionality into both the front and hind legs.
What I want to do with this video is take the script further and make the limbs stretchy.
Again, because we are picking up from where the previous video left off its highly recommended that you watch the first two before this one.
Well, when I was looking into these videos, I initially thought we could cover writing this script in just one. How wrong I was!
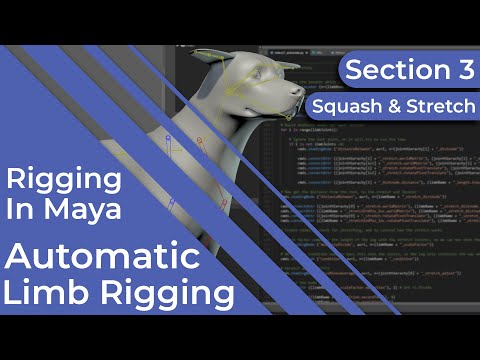
We are now onto video four and in this one we will automate the creation of the roll joints and the associated systems. This will give us a great automatic limb rigging tool which we can use for this, and other projects.
It will also lead us nicely into the next part of our quadruped rig where we will add the ribbons which the driver joints will ultimately drive.
We are now on the last part of this miniseries of videos where we look into creating an automatic limb rigging tool. There are other areas of scripting I’d like to cover but I will look into those in future videos.
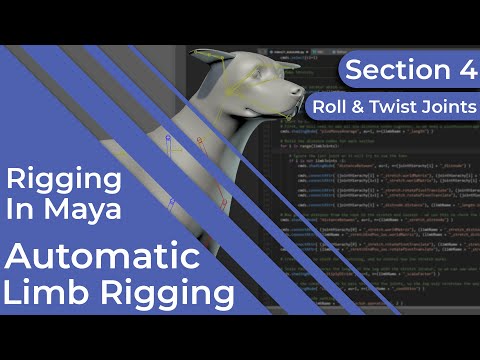
All we are going to do in this video is add volume #preservation which will enhance the overall look of our stretchy limbs.
Now this isn’t strictly something that’s needed for this character, but then again neither are stretchy limbs, but I thought I would include it in the script so you can use it on other characters and creatures you might rig in the future.

Over the last few videos, we got a little distracted with some scripting, but I hope they helped to introduce you to Python and show how useful even some basic knowledge is.
Some of you may be happy to know though that we are back to doing things manually, and in this video, we are finally going to build the #ribbons and controls which our driver joints will influence.
The idea is that using ribbons as a base will make the rig more flexible and open up more options for the animator.
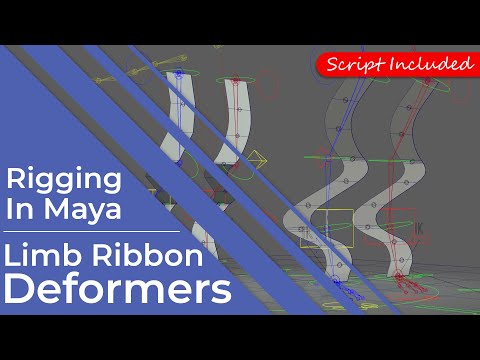
We now have a ribbon driving our joints which gives us a good foundation to build upon, but we can push it further.
In this video we will investigate adding deformers which will bring a new level of flexibility to our rig.
Now to be honest, this isn’t really suited to this character and would normally be used on a more cartoon style creature, but there are elements which will help bring an extra level of realism to this rig as it animates, things like my basic muscle simulation for example.
You can also see this video as a starting point too, and once you grasp the basic idea behind this setup you can add more and build onto it in the future.
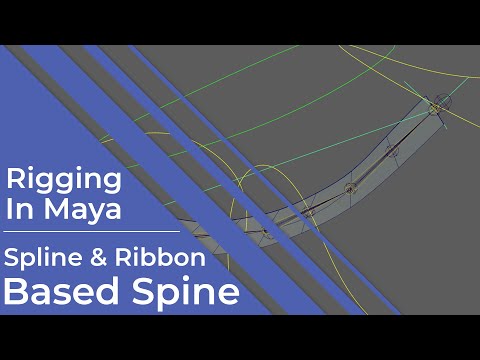
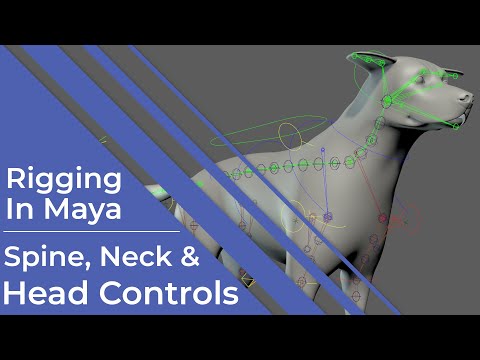
The legs are now pretty much done, so in this video we will look at setting up the spine.
To do this we won’t just be relying on a ribbon to help drive the model, we will also be calling upon Mayas IK spline tool too to give us maximum flexibility.
Now although this setup will be used on a dog spine, it can also easily be adapted to be used on a more traditional, biped rig too.
In fact, we will be using a similar setup to rig our dogs neck too.
We now have a basic spline IK based spine but there's till lots of work to do on it, so in this video we will add the finishing touches.
These include squash and stretch, advanced options for the middle of the spine and also a quick update so we can change the curvature of the spine.
Wow, thirty videos so far…If you’ve watched them all up to now then I want to say a huge thank you for sticking with me.
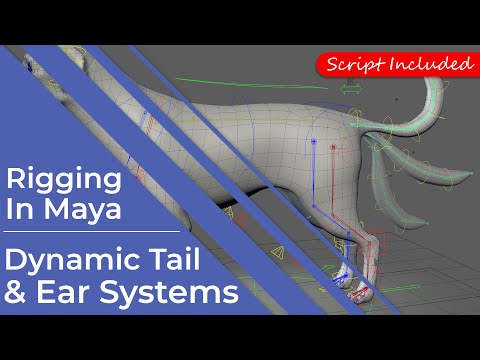
What we are going to do in this video is rig the tail and ears, and to do this we will give the animators a choice of working in either FK, IK or to use a posable, dynamics simulation to automate the movement.
We now only have a few more areas to rig on this dog and then we can move onto the skin weights and adding support for the root control.
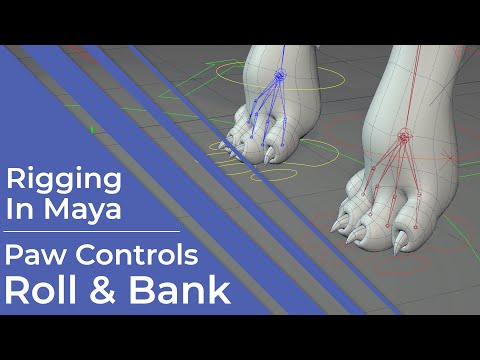
First lets move back to the legs and add in the paw controls, and these will be a mixture of FK and IK controls.
In this first video we will focus on setting up the foot and then adding the foot roll and bank functionality, using nodes rather than set driven keys for maximum efficiency and flexibility.
We will then continue the setup in the next video adding more controls for the animator, plus some extra configuration options for us to use while setting up the rig.
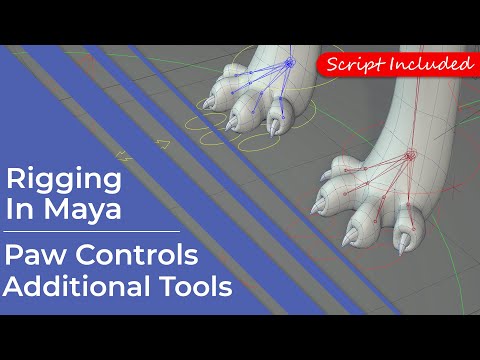
All we are going to do in this video is continue setting up the paw controls, adding more functionality to them and giving the animator more to work with.
In addition to this we will add to the systems we have already created, allowing for some customization over how the paw moves and its key poses.

We only have one more area we need to rig and that’s the dogs facial features. These include the lips, eyes and his nose.
For some of these the rig is relatively simple needing just a joint, a control and a constraint.
With the rest we will be using ribbons to help add more fluidity to the face, allowing for more natural looking poses.
We are getting dangerously close to finishing this rig, and this series. Once this section is complete, all we need to do is skin him, add in root control support and lock him down and then he is ready to be animated.
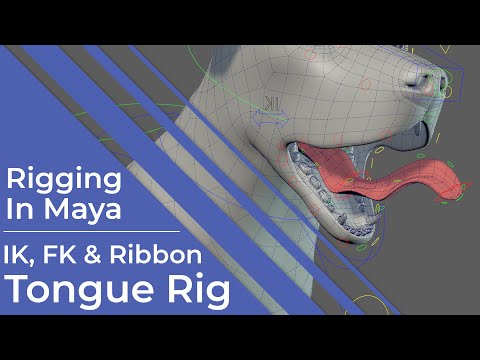
Lets not waste any more time, lets jump in and rig the tongue, and with an animal like a dog or a cat, this is an import area as its in use most of the time.

All the main systems are in place so its time to start thinking about making them move the model. So in this video we are going to look at skinning and editing skin weights.
The difference with the approach this time is we are going to look at how to use ngSkinTools, which is a popular skinning plugin, and something I’ve been asked to cover many times before.
Now don’t worry if this isn’t something you are interested in, many of the techniques shown in this tutorial can be transferred to Maya’s native weight painting tools.

I had planned for this to be the final video in the series, but before we move on and finalise the rig we need to add root control support, so the dog can be scaled, rotated and positioned in the scene.
We also need to double check the rig for any potential bugs and eliminate those before we move on.
We are almost there!
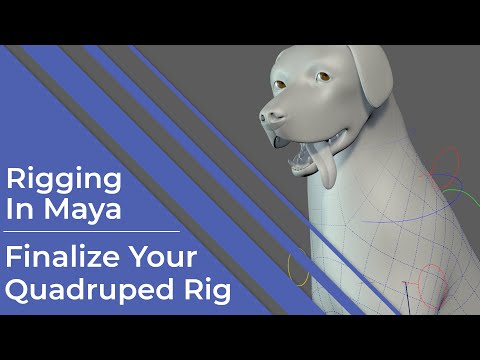
Well, we’ve come a long way over the course of these thirty-seven videos.
My plan with this series was to create something that would take someone with no rigging knowledge and show them how to build a rig in Maya, starting with the basics and working up to more advanced systems.
So essentially, after following all these videos you would be ready to rig anything.
And here we are, two years after I started recording putting the finishing touches to the quadruped rig.
Its been fun but before we all get emotional, lets go over the rig, updating the controls and locking things down so this dog can finally be animated.

