High End Facial Rig
I remember when I was first learning to create character rigs in Maya. It was way back in 2002 while working on the Playstation 2 title Superman: Shadow of Apokolips. Looking back, they weren’t the most efficient rigs and Set Driven Keys (SDKs) were used for nearly everything. The hands were driven by them and so were the facial expressions, in fact nearly every control had some sort of SDK involved.
Don’t get me wrong, the Set Driven Key is a powerful tool in Maya, but can be time consuming to set up, easy to break and a pain to fix. Plus, your scene size can end up bloated by animation curve data.
Over the past few years I have been experimenting with another approach, but this time for more high end rigs as opposed to game ones. One which is more efficient and in most cases easier and much quicker to implement into a rig.
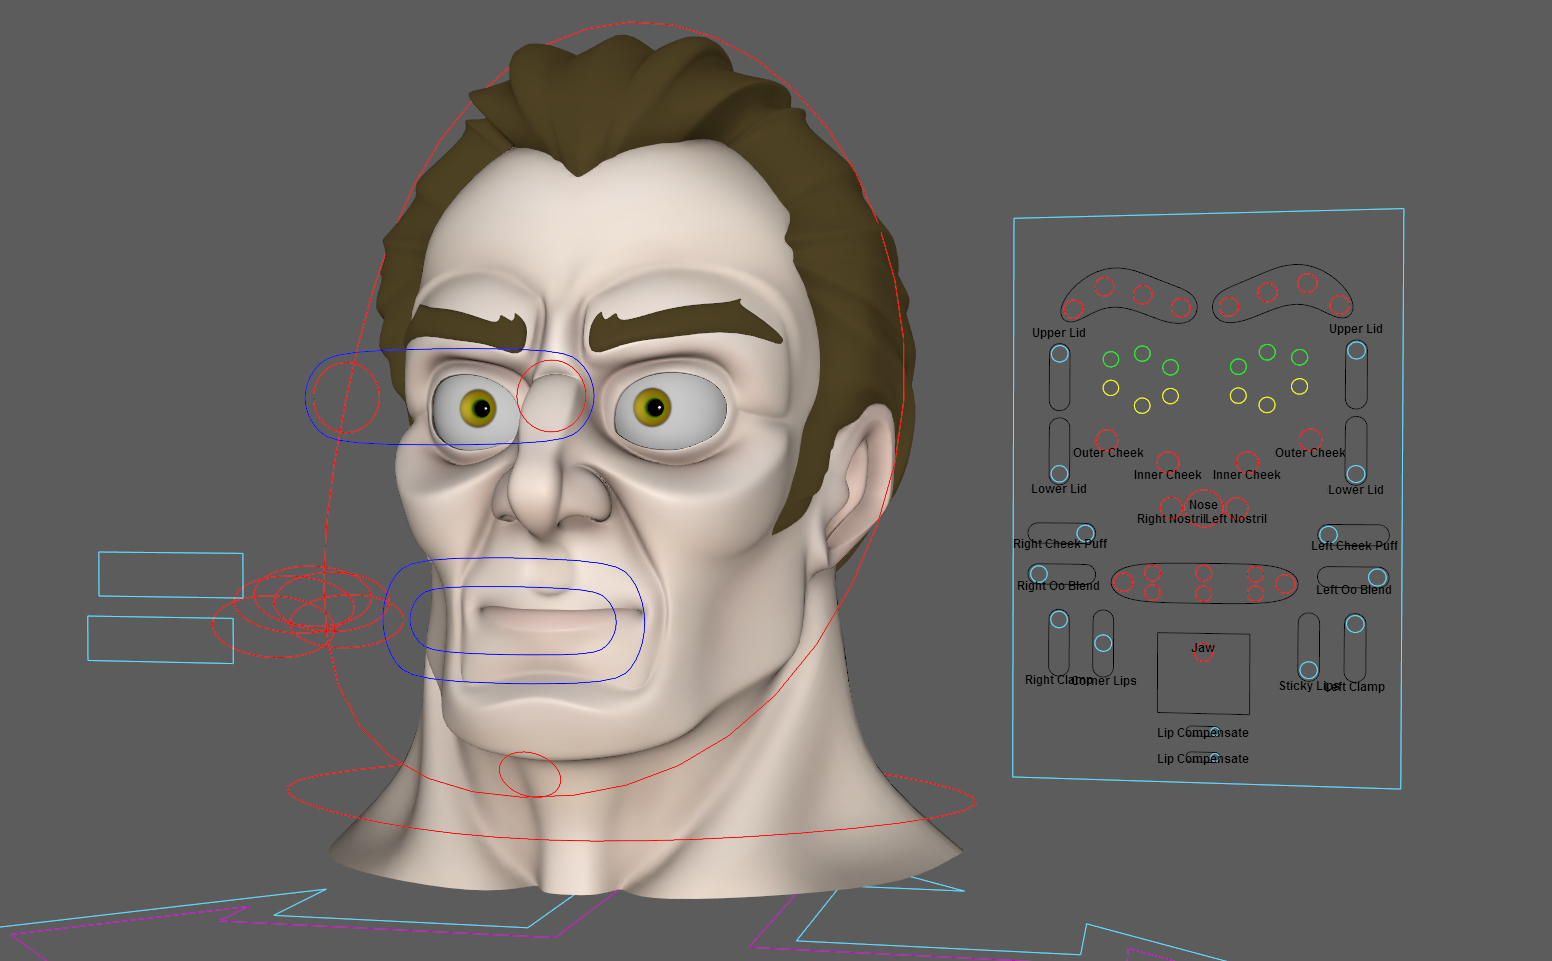
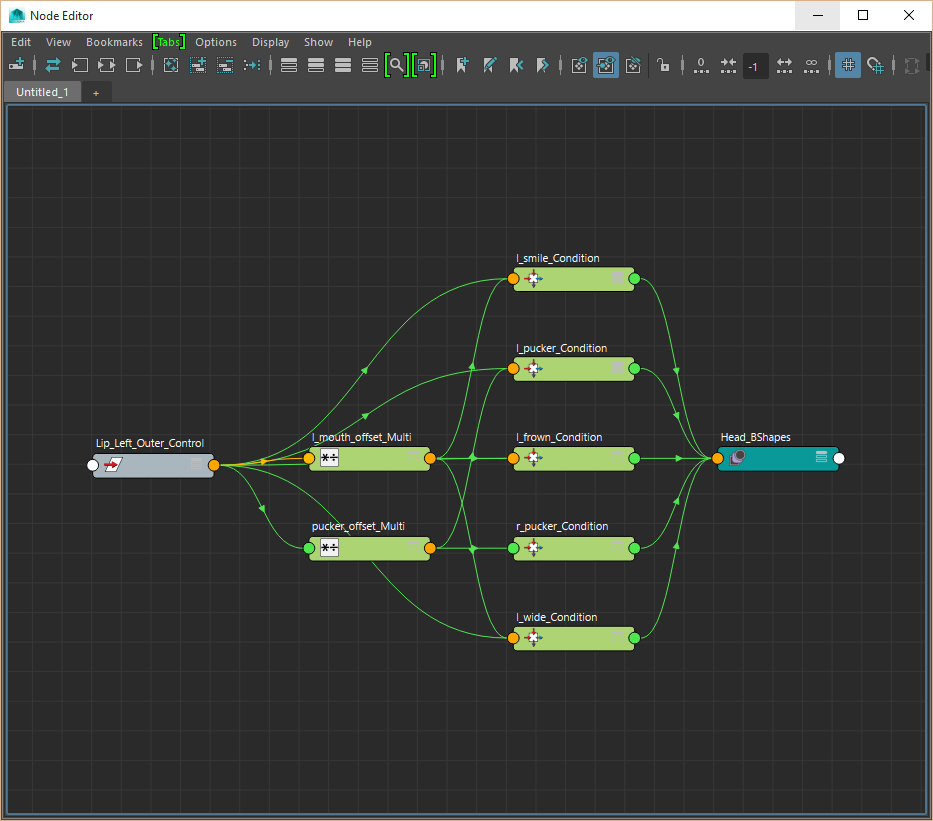
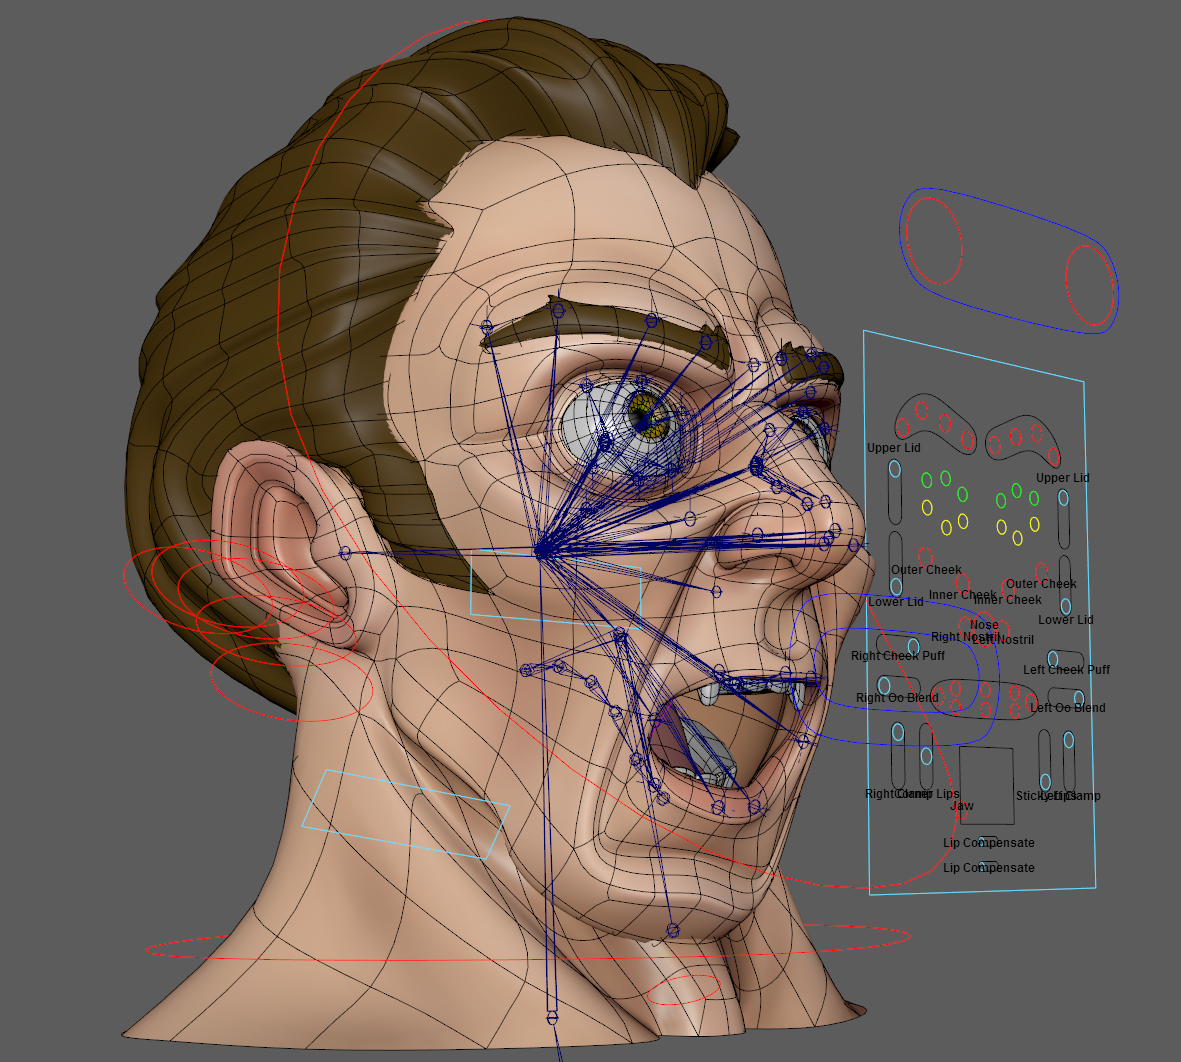
In this tutorial I will be taking you through the steps of rigging a character’s face, but rather than focusing on the more basic areas like joint placement and weight painting we will be looking at an often overlooked aspect of Maya. Its Utility Nodes.
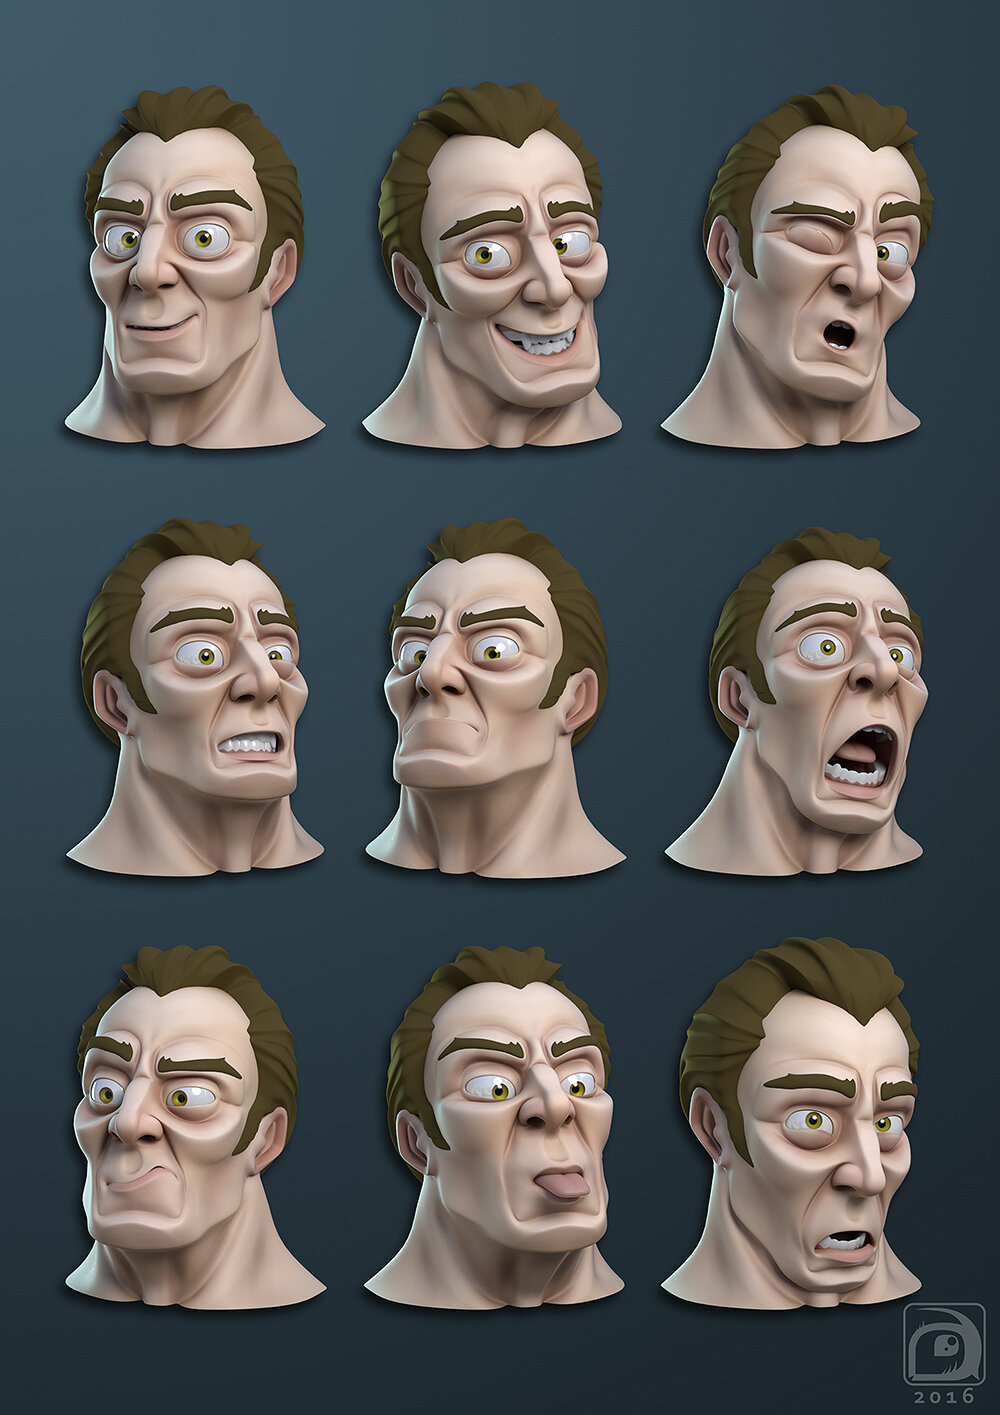
The word “Nodes” can seem like an intimidating one and be associated with highly complicated rigs involving locators, splines and other complex systems but don’t worry. With this setup you will be using a combination of blend shapes, joints and nodes to make a highly flexible character capable of a wide range of emotions.