Xencelabs Pen Display 24
There seems to have been a sudden surge in the digital art market recently, and it feels like every other week a new company emerges from the darkness to introduce us to their own brand of pen tablets and displays. It’s not surprising though with the way the industry is expanding. There’s more demand than ever which is good for us artists because it means there’s more for us to choose from as everyone tries to get their own piece of the pie.
Xencelabs are a relatively new company in this space, and one I’ve been fortunate enough to work with. I’m a big fan of their Quick Keys remote and Pen Tablet Medium, especially the nebula white versions, in fact I use them daily, so when they offered to send me the Pen Display 24 I almost fell off my chair.
Since it was announced I’ve been eager to try it. I’ve heard so many good things about it, but can it really be that good?
The box arrived and I sat down and started to paint, but after weeks of use did it live up to the hype or is it another failed Wacom wannabe?
Read on to find out…
Unboxing
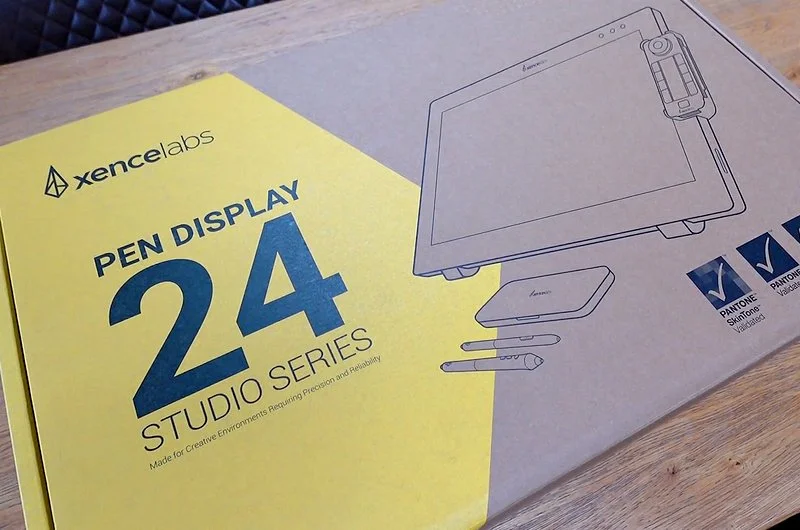
As with all Xencelabs devices, on opening the box you’re met with a thank you note, which is a nice touch, but that’s not all, if you look on the back you will find that it also doubles as a simple instruction manual.

What I love about Xencelabs products is you get everything you need in the box, so you’re always able to jump in and start painting or sculpting without having to buy any extras, and things are no different with the Pen Display 24.
You’re given the Quick Keys remote, which is probably one of the best devices of its type that I’ve used in recent years. It’s also essential when using a larger display tablet as it removes the need for having a keyboard next to you. Xencelabs also supply you with a caddy, allowing you to clip the remote to the side or top of the display, making it easier to reach as you work.

Next, we have the pen carry case and rather than being given a single pen, you’re offered the choice of two. A standard three button pen which I tend to use for 3D work, and a slim two button stylus, which is my preferred option when drawing or painting. You also get two clips for these so they can also be attached to the display for easy access.
You’re given a cleaning cloth and a smudge guard glove, as well as various cables too. A short USB-C cable for charging the remote and then longer USC-C, HDMI and Display Port cables for connecting the display to your laptop or desktop.

In addition to all this you also get a stand. This offers numerous angles for you to work on and even when attached, the Pen Display 24 is still light enough that you can easily move it around your desk.
Setup
Setting up the Pen Display 24 is very easy thanks to the simplicity of the connection options. There are no complicated three in one cables here, all you do is connect the USB-C cable to your computer and then use either the HDMI or Display Port cable too.

You next plug in the dongle, which is used to pair the Quick Keys remote, this is found inside the pen case along with a USB-C adapter if you don’t have a spare USB-A port.
All you do then is attach the power cable, hold down the power button to turn on the display and you’re set.
Next you download the latest driver from the Xencelabs website, install them and when you run the software it should recognise the display, remote and the pens and open them up to be configured.
You are now good to go!
The Tablet

Out of the box the Pen Display 24 is lighter than you would expect at just 6kg, including the stand. Its sleek and solid with a good feel to it. The build quality is good too and you can tell everything has been carefully considered when designing it.

At the bottom are two rubber feet which raise it from the desk while also stopping it from slipping, and on the top, you have the power button which is flanked by two USB-A ports. These also provide power, so as an example, you could use one to charge the Quick Keys remote if needed and plug the dongle into the other.
On the back is the stand, which can be removed and is VESA mount compatible, so you don’t need a separate adapter if you want to attach the display to an arm for example.

Beneath the stand are the main ports. USB-C, HDMI, Display Port and the power port.
Another nice feature is the connections on the cables are all L-shaped, meaning when plugged in they are diverted up the back of the device so don’t stick out, which would potentially cause problems when using the display at a lower angle.

Finally, around the edge of the display you will find a series of slots, which are where you attach the clips for the pen holders. There are a few so you can place them whenever suits you best.
When powered on you will find three touch buttons across the top which allow you to quickly open the options, adjust the pen pressure and switch displays, but these are fully configurable so you can change what they do and their colour.

Even though the device size is over 24 inches wide, the active area is slightly short of this at just under 21 inches wide (but 24 inches diagonally), giving you a bevel around the sides. This isn’t a bad thing as it leaves room for you to rest your hands or have the Quick Keys remote within reach while not covering the screen.
Another welcome feature of the Pen Display 24 is it doesn’t use any fans to keep it cool meaning you don’t get the sudden blast of noise as your working. Instead, they have developed a metal plate on the back which helps to dissipate the heat.
This does all sound amazing but there is one thing missing and that’s touch screen support, but more on that later.
The Screen

Let’s now talk about the 4K screen, and its nothing short of breathtaking. Its bright, crisp and clear plus the colours are truly magical.
It’s said to be capable of displaying over one billion colours and has 99% Adobe RGB and 93% DCI-P3 colour space coverage. It’s also Pantone and Skintone validated, but sadly not HDR compliant.

Xencelabs utilise Super-AG etching which dramatically reduces glare, something I’m thankful of as I work in front of a window so did struggle with reflections on other devices. Even with the screen off you can see how the light gently spreads across the surface rather than being directly reflected.
It’s this etching which also offers that all important bit of friction as you work.
The Pens
Like with many of Xencelabs devices, when it comes to pens you’re spoilt for choice. With some other companies you get a single pen, which is usually the chunkier model, but here you are given two, a three-button pen and a second, slimmer two button pen, both with erasers at the end.
The pens are comfortable to hold and have a rubber grip, with the buttons being easily accessible as you work.
The buttons on the three-button pen are all slightly different too, with one having ridges so you can distinguish between them without looking.
From a technical point, they offer 8192 levels of pressure sensitivity, 60 degrees of tilt recognition and are battery free, which is always a winner in my book. They instead work on electro magnetic resonance technology, just like Wacoms.
In addition to the pens you are also given 10 extra nibs, 6 standard and 4 felt so you can configure the type of feeling you want as you work. Theres also a handy ring which helps you remove the nibs too.
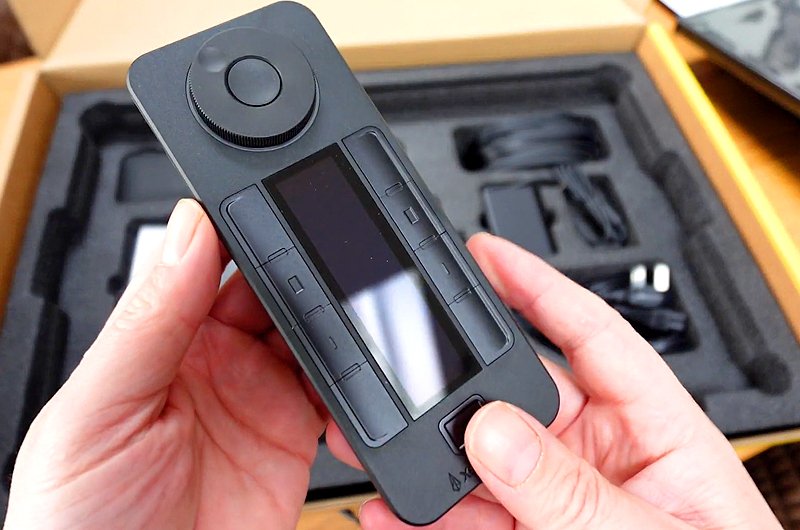
The Quick Keys Remote

Having reviewed the Pen Tablet Medium Bundle previously which also includes the Quick Keys remote, I’m already familiar with it and have spent plenty of time using it and as mentioned, its still one of my favourite hotkey remotes.

Its light and easy to hold, plus you can use it in any orientation to suite your working style.

As for configuration options you are truly spoilt. There are eight buttons in total and you can toggle between five sets giving you a total of forty shortcuts per application.
You also have a dial which can be configured differently for each application, so for example, when painting it can quickly adjust the brush size whereas if you’re sculpting it could adjust the division levels on the model.
Again, there are several sets you can cycle between using the button in the middle. So you could quickly swap between brush size and division levels in the same application if needed, and the wheel colour changes too, to represent what you have it set to.
Down the centre is an OLED panel, and I do love this feature. It helps to remind you of what each button is currently set to do, which as you can imagine, when you have forty different settings is useful.
I’m always forgetting what each button is setup to do in each application, so with this remote, a quick glance can help me find my way rather than guessing and pressing the wrong one.
Battery life is very generous too and it’s said that it can last anywhere up to fifty hours on a single charge.
On a side node the Quick Keys remote is also sold separately so could be a handy addition to your desk, even if you don’t own any other Xencelabs devices.
The Tilt Stand

The Pen Display 24 comes equipped with its own tilt stand, which is something that is needed with a device of this size.
Its small but feels very sturdy, with no noticeable wobble as your working. Its also easy to use and can quickly be adjusted with one hand reaching over the top and pressing the lever.
You can then choose an angle between 16 and 72 degrees which is a good range. I sometimes use it lower, and other days I feel more like sitting upright so its great to have the option.
The only thing it can’t do is rotate on the stand, but to be honest, I never really used that option with other devices anyway.
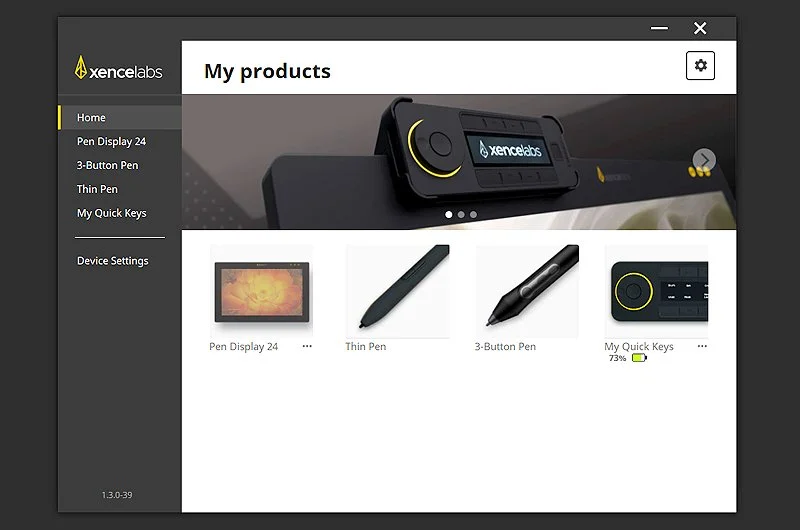
Configuration
The Xencelabs software offers so much in terms of configuration, plus its streamlined and easy to use. It focuses on the main functions of each device without being bloated with lots of extra options which you will never use.
You are simply given a choice of what’s currently connected and when you select one, it opens its options.
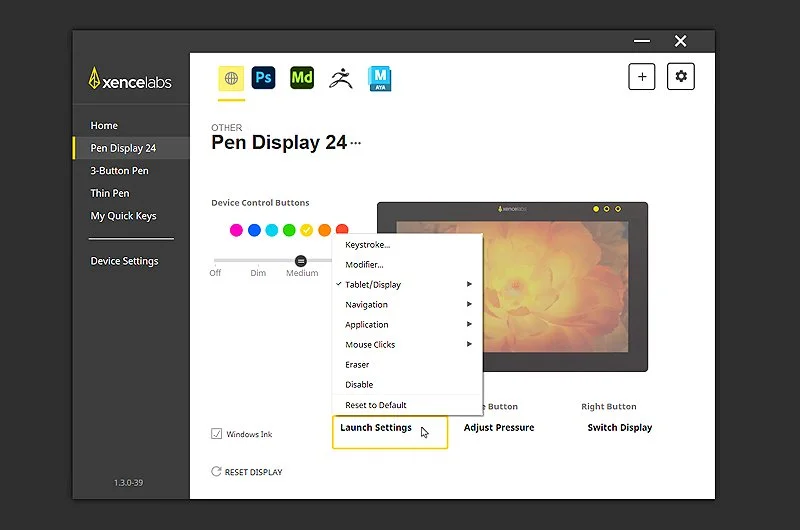
With the display we can change the colour of the three control buttons and choose what each does with the drop-down menu, and these are the same options you can choose from when configuring the pen buttons.
So, we can define a keystroke or a modifier like control and alt. You can also choose from options which effect the display, general navigation or run a specific application.
You can also mimic mouse clicks, which is better suited to the pens.

Speaking of the pens, with those we can change what each button does and play around with their pressure curves. There are also advanced options if you want to fine tune them.

Finally, we have the Quick Keys remote. This has heaps of options which is why it’s so useful. Each keystroke you define can be named, and this is what’s displayed on the remotes OLED screen.

Under the customize menu you can change the orientation of the text, so if you use the remote in a specific way you can change the text to match.
All these can be configured differently for each application you use, and it switches automatically. Don’t worry though, if you don’t have time to set everything up for each application, the software offers a default setup for the more popular apps which gives you a good head start.
Theres so much to play around with, plus I found the drivers to be very stable and I’ve not encountered any issues so far.

One piece of advice though, if you’re using a 3D application, like Maya or Substance 3d Modelor, and you find the right click isn’t working, disable Windows Ink in the Pen Display 24 tab, and this can be done on a per-application basis too rather than globally.
The Tablet in Use

As with every tablet I review, I like to take my time and complete a project using it to get a full feeling for what its like to use. This can take a while, but I’d rather not rush out a quick test in a few hours.

The usual line tests produced good results. With smoothing disabled in Photoshop, the straight lines only had a very minor wobble on them, even while using a ruler. Other lines were smooth with no discernible lag and the pressure came through very nicely.

Parallax was good too, the optically bonded screen really did help to reduce the distance between the pen tip and the cursor, plus the cursor followed the pen right to the end of the screen without any visible drifting.

I spent a lot of time working on the Pen Display 24, using apps like Photoshop, ZBrush, Maya and Substance 3D Modelor and its honestly the best experience I’ve had with a pen display to date.
Its so nice to work on. Each brush stroke is silky smooth, and the crisp bright display just looks amazing. Theres no grain which is something id become accustomed to with my Cintiq Pro 24.
The lack of any noise or heat on the surface was also noticeable, even after using it for a number of hours there was nothing, not a sound or a change in temperature.
I enjoyed it so much that this is now my device of choice, and I can see myself having many, many years of fun working on it.
With that in mind, there was one area that let it down and that was the lack of a touch screen.
I realise this is a bit of a debatable issue as, so I’m told, many artists tend to disable this feature on large display tablets, so Xencelabs opted not to include it, but unfortunately, I’m one of those artists who used it, and if you look back over some of my videos you will see that I used it a lot.
I just felt not having the ability to pinch, pan and zoom directly on the screen reduced my overall productivity. It’s a much more natural way to work and as much as I love the Quick Keys remote, there was always that disconnect as I glanced and pressed a button so I could rotate the canvas.
I was at recent event demoing the Pen Display 24 on the Xencelabs stand, and what was interesting was that the first thing most people did when trying it was reach up and try and pinch and zoom on the screen. Overall, they were impressed with the device, but ultimately disappointed when I told them it wasn’t touch screen.
Perhaps Xencelabs could add this feature on future devices but give us, the users, the option of whether we want to use it or not? Or maybe offer two devices, one with a touch screen and another cheaper one without?
Should You Invest?

To date this is hands down one of the best combinations of pen display and remotes I’ve used, for drawing, painting and 3D work. You get so much for your money, the gorgeous 4K screen, a stand, extra pen and the quick keys remote, but it doesn’t feel like it’s an inferior device, well, at £1,850 its certainly not “cheap” but relatively speaking, compared to some of Xencelabs competitors its very cheap!
It’s just so nice to work on. The feeling of the pen on the screen, it’s so smooth and responsive, but with a bit of bite giving you that all important feedback. We can’t not mention the exceptional build quality either or the fact its silent and keeps itself cool.
There’s a lot to love with the Pen Display 24, but for me personally, if this had a touch screen too, it would be pretty much perfect.
Although Xencelabs supplied the Pen Display 24 for me to test, the opinions offered in this review are my own.