Huion Kamvas Pro 13 (2.5K) Review
When asked about which is better, a pen display or a pen tablet, I would almost always recommend a pen display, but it does depend on the device and more importantly, its screen. A lower quality screen can make it difficult to be productive and in some cases a pen tablet is a better option.
It’s been a long time since I reviewed a Huion pen display, with the last one being the GT220 back in 2014, so I was excited to be offered a more up to date tablet to try.
With the Kamvas Pro 13 2.5k, which is also available with a larger 15.8 inch screen, Huion are upgrading their original models with a brand new QLED display, offering a higher quality screen but also at a much higher price point.
So, with so much competition now in the pen display market, is the upgrade worth the extra money?
Read on to find out…
Unboxing
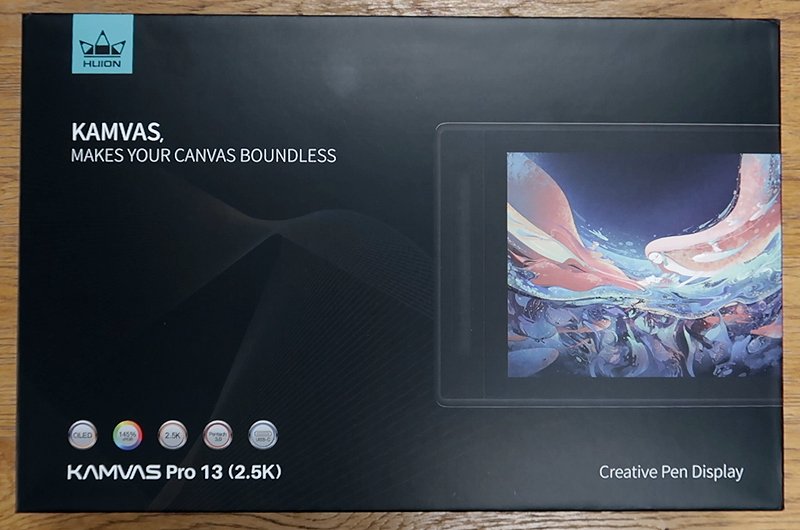
On the front of the box, you can clearly see the specifications of this device, with its enhanced QLED display, 2.5k resolution and Pentech 3.0 technology.
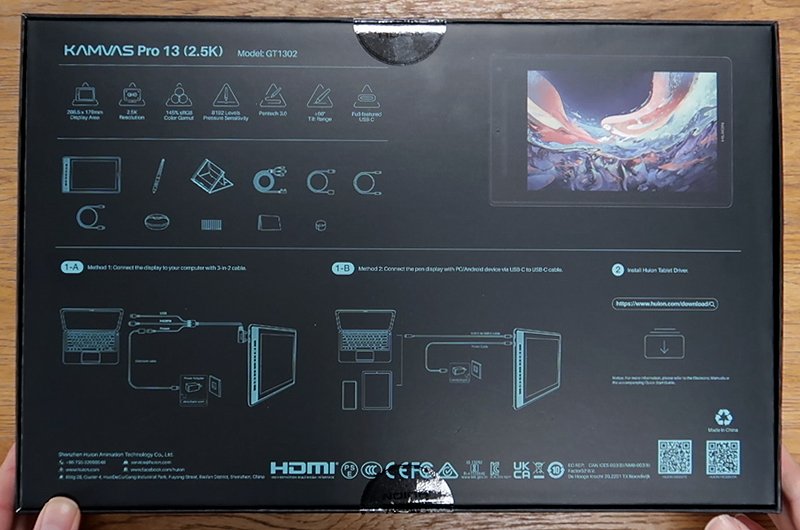
On the back we have more details on the pen display, as well as what’s included in the box. You also get a glimpse of the various connection options available so you will see that you can connect this to a computer, tablet, and a smartphone.

After opening the box, you will see the pen display sitting proudly on top, wrapped in protective plastic, and beneath this we have a stand. Yes, the Kamvas Pro comes with a separate stand, which is a useful and thoughtful addition.
Beneath this we have a series of boxes. One for the digital pen, another with the instructions, a cloth and a glove, which is another welcome extra although it was a bit small for my hand.
You also get a pen stand which is also home to the extra nibs, plus all the cables. What’s good about this bundle is that unlike some other pen displays I’ve reviewed, Huion give you everything you need in the box without you needing to pay for additional cables or accessories.
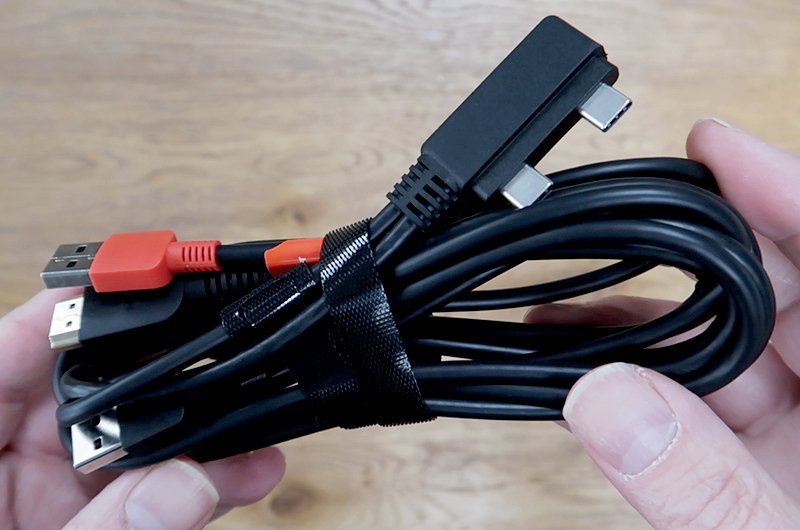
In the next box you have the cables, and as well as the two in one cable which will connect to your computer through its HDMI port, you also get a USB-C cable, which is a much quicker and less cluttered way to connect the device.
As well as its plastic case, the tablet also has a protective cover over the screen, which you remove with a sticky label, although this didn’t work for me. The label ripped as it came loose so I had to remove it from another corner, which isn’t really an issue, although it has left me with a small sticky patch next to the shortcut keys.
Setup
My experience with setting up the Huion Kamvas wasn’t as smooth as I would’ve liked.

I went through the usual process of first heading to the Huion website and downloading the drivers. There were two on offer, so I grabbed the most recent version, as I assumed these were the best and there was no mention of them being a beta release.

I installed them and then connected the device, first using the two in one cable. Straight away I had issues with the display starting up and then dropping out, with the software saying it was connected and then that it wasn’t.

At this stage I didn’t have the extra power cable connected, so I tried plugging it in and it did stabilise the Kamvas. You see, with some of these display tablets, the power cable is used mainly to boost the displays brightness but here it seemed like it had to be connected too for the display to work.
I also tried the USB-C cable, but this had similar issues with me needing to also plug in the power cable too, which I thought was strange.

The next issue I had was there was no pressure being registered from the pen and no matter what I tried I couldn’t get it to work.

I then decided to do a full reinstall, but this time I tried the older drivers, and this solved almost all my issues. Using the USB-C cable was now a more stable and a less cluttered option, although I did still have issues with the two in one cable. The tablet wouldn’t stay connected until I plugged in the power cable, but I could then unplug the power cable and it was fine. In short, I didn’t end up using that option.
I’m happy to say that using the older drivers was the way to go and if I’d downloaded them first, I wouldn’t have had any major issues.
Now I’m sharing this just in case you run into similar problems, so if the display seems unstable, try the other drivers.
The Tablet

With its textured aluminium back and rubber feet, the Kamvas Pro feels like a higher quality product, which at almost three hundred and eighty pounds you would expect it to be.

At just 1kg its relatively light, and its only 1cm thick so it’s also portable. With regards to buttons around the sides, its very minimalistic. All you have is a power button and two USB-C ports, so there aren’t any unnecessary sliders or rocker switches to play with. Things like the screen brightness and colour temperature are controlled through the software and the on-screen display, so there are no need for these extra buttons.

On the front you have seven fully customisable shortcut keys, each with its own raised symbol which makes it easier to find the right button while your focused on the screen. These are a nice size and have a satisfying click to them.

The big selling point to this upgraded version of the Kamvas Pro is the new 13.3 inch QLED screen, giving you a resolution boost from the standard 1920x1080 up to 2560x1600. Not only this but the quantum dot film is said to give you deeper blacks and more vibrant colours.

I do admit that on first seeing the screen in action I was impressed. Its bright, clear, and colourful and the extra pixels make a huge difference to the way I used the device.
The Kamvas Pro is also equipped with anti-glare etched glass which does help to reduce the amount of reflectivity you usually get with glass screens. Unfortunately, this does also mean that, just like Wacom devices, there is a very slight grain effect on the display, but once you start working you hardly notice it.
The Stylus

It seems that Wacom have set the standard when it comes to the stylus as most other companies tend to offer similar pens. It’s the same with the Huion digital pen, but this isn’t a bad thing.

There are differences like the tapered rear half and the lack of an eraser, but we do have the same rubber grip and two configurable buttons. The specifications are the same too, with both offering 8192 levels of pressure sensitivity and over 60 degrees of tilt recognition, plus they are both battery free.

Huion have taken the opportunity to enhance their pen though with the addition of what they are calling Pentech 3.0 technology, which is said to improve stability and give you a pen tip which brings you closer to the canvas.
All comparisons aside what you have is a comfortable and responsive stylus which you can happily draw, paint, or sculpt with for hours on end. Although it does have a slight “pen on paper” feel already, Huion provide additional felt tips which will increase the friction and enhance that feeling.
The Stand

I was so happy when I lifted the display out of the box and saw the stand sitting beneath it. I think it’s a good move supplying it with the device because I almost never use a pen display tablet with it flat on my desk. I have a few cheap alternatives I use to prop up my devices, but nothing beats an adjustable stand.
It has been designed with the same brushed aluminium as the Kamvas Pro. With a black plastic base, so it matches the device its made to hold.

The stand also offers three different levels for you to work at, and it’s a simple case of folding out the one you want and sitting the display on it.
Configuration

The Huion software is refreshingly simple, with no extra bloated options or tools to play with. It’s a straightforward configuration tool which is easy to navigate and setup.

The first screen allows you to configure the tablet, and one of the first things you should do is change the working area. This dictates what portion of the screen is being used by the display, so I have it setup as a second screen.
Its also a good idea to make sure screen ratio is set too, so you get a true one for one experience as you sketch.

You can also setup the keys and there are lots of options available, so they can essentially do anything you need them to.
Next we have the digital pen settings, and there are just a few options here allowing you to configure the buttons.
You can also have the keys setup so they work differently depending on the software you are using. All you do is add a program to the list and the software will automatically switch the settings over as you start using it.
Finally, we have the main options screen which offer some basic cosmetic changes and system options. What’s more important here is in the device section.

Clicking on OSD Settings will bring up a new window so you can adjust the screen brightness, colour temperature and the scene mode. Its important to note that the brightness option will only be available when scene mode is set to standard mode.

A useful feature is that you can access a lot of the display settings directly on the device itself. Holding down the power button will bring up an on-screen display, so you can interactively change these and other options in a much quicker way.
The Tablet in Use
After the initial teething problems with the setup, I settled in and started working on some artwork and found myself enjoying using the Kamvas Pro. The screen is glorious, and you can really tell the difference between this and a standard full HD pen display. Its crisper and I felt like I had more room to move and be expressive.

The only thing I had to do was scale up the user interface to 125% because the fonts were a little small, but some of you may be fine with them at that size, which would give you even more room to work.

While doing some basic tests I found the pen to be precise and responsive, especially when creating circles. Lines were straight with no visible jittering, even when using a ruler.

I also didn’t notice much in the way of parallax, which basically means there was no real distance between the pen tip and the cursor which makes for a more immersive way to work.

To me, it felt very much like working on one of my all-time favourite devices, the Wacom MobileStudio Pro. The resolution is slightly bigger on the Kamvas though, and the screen just felt a bit brighter and more vibrant.
What I did miss was the touch screen, but this is mainly because I’m used to working with one. I just find it more intuitive to pinch and pan around the canvas this way. I would’ve also preferred a more interactive way to adjust my brush size, rather than clicking buttons. A dial of some sort, or even a touch sensitive strip would’ve been better.
These are just small, personal issues though which the majority of people won’t even notice.
Should You Invest?
With devices like this it always comes down to price, and at £379 it’s not cheap. With that said, when you compare it to other similar devices, it sits somewhere in the middle, yet it offers some impressive specifications, so when looking from that perspective the price is probably on point.
Yes, there are much cheaper options but then you sacrifice the screen quality, resolution, and often functionality too.
Its funny, it doesn’t feel like too long ago when Wacom were king of the creative tablet space and one of the only brands I would recommend, but it looks like things are changing. There are so many high-quality devices being released these days, which are cheaper, but that can only be a good thing for us the consumer.
With the Kamvas Pro 13 2.5k, once I got used to not having the touch screen functionality, I found it to be a joy to use. The only thing I would recommend, and I go by this with every pen display I review, is if your budget can stretch to it, I would go for the bigger version for a more comfortable working area.
Although Huion supplied the Kamvas Pro 13 (2.5K) for me to test, the opinions offered in this review are my own.