XP-Pen Innovator 16 Review
XP-Pen are a company that have been creating various devices for over fifteen years now, the problem is that because they are at the bottom end of the price range, people assume they are lower quality. I admit that until recently I was one of those people, but after trying their tablets, I can happily say I was wrong.
Although the prices have been kept low in the past, with the Innovator 16, XP-Pen are attempting to give its users the option of a higher quality device, if they are willing to pay a bit more for it.
On the surface, the new display tablet is sleek, with its black and silver casing, making it seem like a more professional device. Something you would expect to see sitting on anyone’s desk in a visual effects studio. This may be all well and good, but we all know that looks can be deceiving.
So, with the higher price tag and its stylish new design, is the Innovator 16 a case of style over substance?
Read on to find out…
Unboxing

The 15th anniversary edition of the Innovator 16 box is a world away from the original, with its bright blue background and eye-catching colours. It feels exciting, like there is a party going on inside and everyone’s invited.
Opening the box, you are presented with the tablet in all its glory, protected by its plastic wrapping. Once unwrapped, you are given instructions on how to remove the film which protects the screen while being careful not to also peel away the anti-glare film. As always, peeling this away is very satisfying.
Next to the screen you have eight customizable buttons, a dial which you can rotate and inside that, a touch pad. On the side of the Innovator 16 you will find the power button and what look to be volume buttons, but these actually control the screen brightness.

Next, we have the stand, yes it comes with a stand! This will only raise the table to one level though, but its quite sturdy and its nice to have that included in the box.
Beneath that we have the usual power adapter assortment, so you have plenty of options depending on where you live, plus a mysterious white box and of course, the all-important stylus.
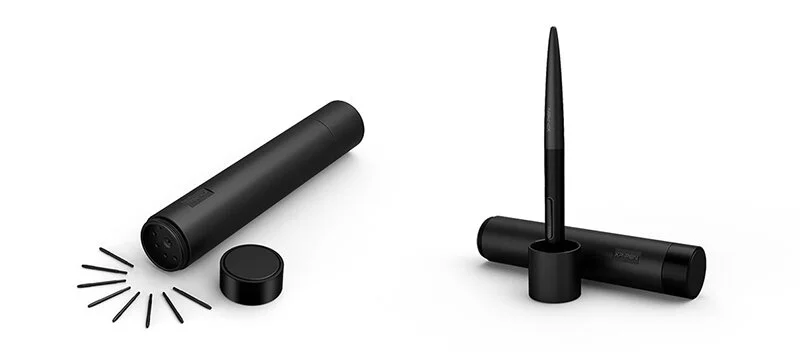
This seems like it is pretty much the same pen that comes with the Deco Pro which I reviewed previously, except its black and metallic grey rather than silver. Its housed inside a large tube which also acts as a pen holder and a place to store the eight spare nibs you get.

Now onto the box of goodies. These only come with the 15th anniversary edition, so make sure you order the right version if you want all these bonus treats. These include a ball point pen and a smudge guard, although you may get the glove with the basic version too.

You also get a Fenix keyring, a sticker pack and a set of postcards, so some really nice additions. All you are left with then are the cables, or should I say cable as this is a neat three in one design which means there is less clutter around your desk.
At one end you have the HDMI, USB data and USB power sockets which you plug into your computer, this then goes into the Innovator 16 using a USB-C socket.
Setup
Getting started with the Innovator is very straight forward with the supplied instructions. You plug the HDMI cable into your computer along with the USB data and USB power cables and the device should then turn on. You can of course use the USB power cable with one of the supplied power adapters if you prefer.

One thing to note is you don’t have to use the power cable, you can just use the HDMI cable as the main power source. This does affect the screen though and you will find that the brightness is limited to about half the amount. I guess this option is available if you decide to use the Innovator 16 as just a drawing tablet, so with the screen turned off, which is an alternative option.

With my setup I didn’t have a spare HDMI input so I had to instead find an HDMI to Display Port adapter and use that. Something to keep in mind if you decide to get one and you face the same limitations.
Once connected you then go to the XP-Pen website, download and install the drivers. If you’re using Windows you will also need to make sure you setup the desktop to work across multiple monitors, so you can easily access the tablets screen. Initially I had some issues with the stylus not being registered, and then the pressure not coming through. I had to restart my PC a few times and play around with the Windows Ink settings to get it to finally start working. I seem to remember having a similar issue when setting up the Deco Pro.

Once I had Photoshop running, I immediately noticed just how yellow the default colour profile was, so I had to go into the colour management controls and adjust the temperature, but this is more a personal preference.
The Tablet
The Innovator 16 is a stylish device, and you can see that XP-Pen are trying to push this to a higher level of user. It doesn’t feel like a budget tablet, instead the metallic silver and cool black give it a more professional look and feel.

Being 44 centimetres wide it does feel quite big, but this is also an extremely thin device. At only 9mm its thinner than an iPad and its not too heavy either, so you could easily work with it in your lap rather than sat up to a desk.

I love the addition of the configurable keys, dial and touch pad. Personally, I use these a lot when painting as I prefer to push the keyboard aside and focus on the canvas in front of me, and having physical keys allows me to do this. The buttons are sturdy and give a nice click when used, plus four of then have a raised ridge so you can feel for the right key instead of looking for them.
The wheel is a nice addition but did feel a bit too free with its movement. It would’ve been nice to have some sort of feedback or make the rotation stepped, but then I guess that may limit how some people work.
The screen is bright and colourful and with the introduction of XP-Pens full lamination technology, which seamlessly combines the glass and screen, parallax is a thing of the past. As you paint there is almost no visible distance between the pen tip and the pixels.

Speaking of pixels, even though this is just a full HD screen which gives you a resolution of 1920 by 1080 to play with, the pixel density works well so you aren’t seeing each physical pixel as you work, yet the screen remains crisp and clear. All in all, this is a solid piece of kit and would be welcome on anyone’s desk.
The Stylus
The stylus which comes with the Innovator 16 is a good size. Its thicker at the base and tapers towards the end which means it fits nicely in your hand as you hold it. The rubber grip also adds to the comfort, with the two buttons being in easy reach of your finger so you can quickly access your tools without looking away from the canvas.
Its light, and when compared to pens developed by other companies, they do feel a little bit more substantial in your hand. The stylus boasts 8192 levels of pressure sensitivity and full tilt control reaching around 60 degrees, making this perfect for those who enjoy sketching and painting digitally, plus the addition of eight extra nibs means you will be working for a long time before you have to pay for any more.
One huge benefit is this stylus is battery free, so you don’t have to worry about losing power while you’re working and then having to hunt for a replacement.
Configuration
To help you configure your Innovator 16 you are given a pen tablet tool. This is the same software which is supplied and used on many of the other XP-Pen devices and is installed along with the drivers.

The tool gives you the option to configure both the tablet and the stylus. With the stylus, you can control the pressure sensitivity as well as what actions the buttons perform when pressed. These can mimic the standard mouse actions, so right, left and middle click. You can set them to run a specific program or you can have a more custom setting using a specified hotkey or other option from the function key menu.
When it comes to the tablet you initially have controls over how much of the desktop is represented on the screen. You can also adjust the display settings, as I had to when initially setting up the device and found I needed to adjust the colour temperature. You also have plenty of options when it comes to the express keys and roller wheels. Again, in a similar way to the stylus settings, you can choose a specific function or create your own using keystrokes.

What is really useful, is these can be set on a per application basis, so you can use different keys when painting in Photoshop compared to if your browsing using Google Chrome. As an example, I had the wheel set to adjust my brush size when in Photoshop, but then used it to scroll up and down a web page when using Chrome.
The only downside is that you don’t have the same options available to the stylus, so you have to work out which configuration works best in all scenarios.
The Tablet In Use
When it came to testing the Innovator 16, I decided to set myself a task. I like to paint stylised portraits and usually use a larger, 24 inch screen to work on. With my next portrait I decided to paint entirely on the Innovator 16, so I could get a better idea of what it would be like to work on over a long period of time.

You see, I paint these portraits in my spare time and they usually take me around two weeks to complete, working an hour a day. So, this seemed like the perfect way to test the device. Initially, I did struggle with dropping down to a 15.8inch screen, plus the lower resolution meant the Photoshop UI was more cramped than I’m used to. I also missed the touch screen controls, which the Innovator 16 doesn’t have, so moving and rotating around the canvas felt more laboured than usual. Now I do realise these are issues that most people won’t experience and its purely because I’m coming from a more high-end device.
So, with those aside I was impressed with how well the Innovator 16 performed. The eight thousand levels of pressure sensitive came through nicely, and the addition of the slight grain on the surface helped to grip the stylus as I worked. This gave it more natural feeling when sketching.
With a pen latency of just 16.4 milliseconds I didn’t suffer from issues of lag, but with my current desktop I wasn’t expecting to see any, and the reduced parallax meant I felt closer to each pixel.

The express keys were extremely useful, as were the wheel and touch pad, although I did find that as I rotated the wheel my thumb would inadvertently end up touching the pad too, something that did get annoying after a while, so I had to adjust the angle I worked at.
Should You Invest?
Each year the gap between the lower end tablets and the more coveted, high end devices gets narrower and narrower. Companies known for being expensive are now experimenting with lower end devices to expand their market, whereas those developing at the more affordable end are now pushing the quality while trying to reign in the price.
Now we can’t get around the fact that people are going to compare this to a Wacom device, and the closest would be the Wacom Cintiq 16. They have the same screen size and resolution, and similar features, but the Wacom is almost £100 more expensive. In addition to this the Innovator 16 has the express keys whereas if you want that option with the Cintiq 16 you will need to buy the express key remote.
Don’t get me wrong, the Cintiq 16 is an excellent device, I just wanted to show you the alternatives. My overall experience with the Innovator 16 has been an extremely positive one. I have enjoyed using it and I would highly recommend it to anyone who is looking for a good quality, stylish screen display with lots of features.
Although XP-Pen supplied the Innovator 16 for me to test, the opinions offered in this review are my own.