Pro Pen 3D Review
When it comes to drawing, painting or sculpting digitally the pen you use is just as important as the device you are working on. Just like any input device it must be comfortable as well as functional but most importantly it needs to feel “right”. That’s quite a general statement but until you touch the tip to the screen you don’t know if that pen in your hand hits that all important sweet spot while also capturing the natural feeling of drawing on paper.With the Pro Pen 2, Wacom hit all the marks and when used with the Mobilestudio Pro it felt like the perfect partnership. So where could Wacom take the Pro Pen from here?
The answer is to bring us the Pro Pen 3D, their version of the Pro Pen 2 but aimed more at those of use who like to work in three dimensions rather than two.
There are lots of subtle differences with the new pen but the most notable is the new button. When working in 3D you don’t have the need to erase your work, as you would in 2D, so Wacom have moved the eraser button from the end of the pen and placed it next to its other siblings closer to the tip. The reason, to make navigating in a 3D application easier and quicker.
This does sound ideal but the question you need to ask yourself is should you pay an extra £89.99 for a Pro Pen 3D if you already own a Pro Pen 2?
Read on to find out…
Unboxing

The Pro Pen 3D comes in a small box, as you would expect. Inside you will find the same cigar shaped carry case as the Pro Pen 2 with the Pro Pen 3D sat comfortably inside.
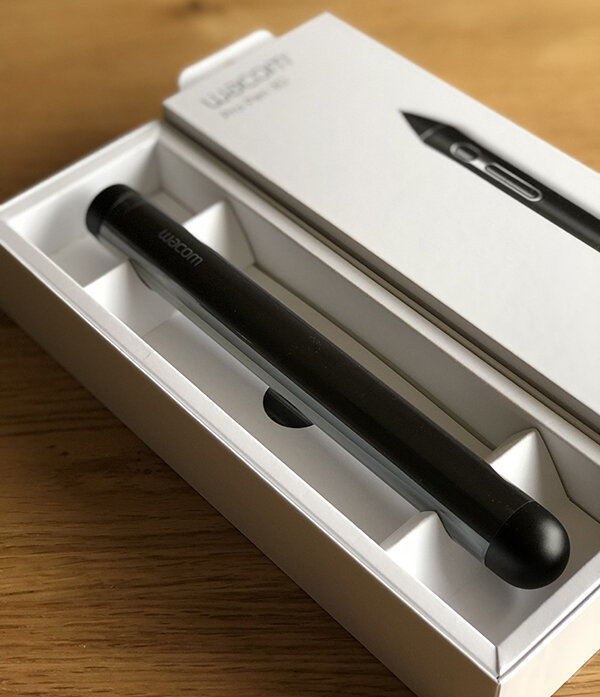
Just as before you also have six extra nibs tucked away in the end as well as the usual colour rings, so you can personalise your pen.
Setup is dead easy as the device you are using, (in this review it will be the MobileStudio Pro 16) will recognise the pen as if its always known it. Welcoming it into the family, well, that is if you have the latest drivers.
The Device
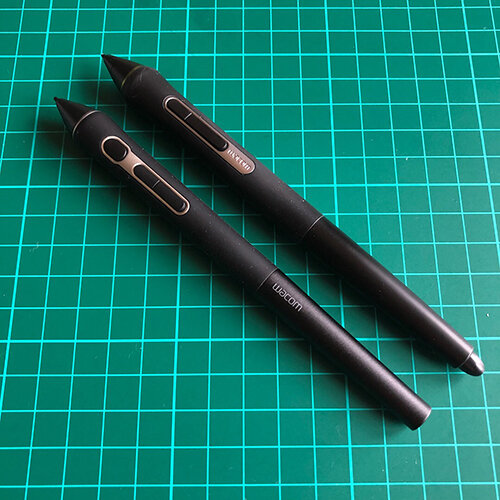
When comparing the Pro Pen 3D with the Pro Pen 2 there are more subtle differences than the movement of the button. Its slightly shorter and slimmer too plus heavier towards the lower half. These small changes do make it much more comfortable to use. I've switched between both pens and given the choice I would always use the Pro Pen 3D, it just feels better in your hand.
The toggle switch has been made slightly smaller to make room for the new button which sits in front of it, closer to the tip. This makes it easy to access as your working.
Configurability
Setting up the Pro Pen 3D is essentially the same as you would with any other Wacom pen. You open the Pen Settings via the Wacom Desktop Center and here you can specify what each button does on a per application basis.
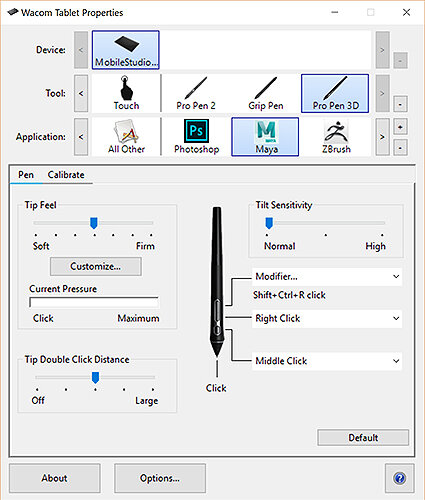
There are a whole host of options available to you when choosing what each button does. As well as the basic mouse clicks you can also specify a modifier, (alt, control, shift etc.), a keystroke combination as well as setting them to open one of the many on screen controls you can also create and use.
General Use
Ok, so with all that out of the way lets get down to the nitty gritty. What’s the pen like to use?
As mentioned previously, from a comfort perspective its certainly better to hold than the Pro Pen 2. However, the new configuration does take a while to get used to. I found that I kept accidentally pressing the new button when I didn’t intend to, because of the new placement it’s a lot closer to my finger.
I also found that I had to stretch a little more to reach the third button, the one highest up the pen. It’s not a natural movement for me, I found it much easier to access the lower buttons so kept the upper button for less immediate tasks.
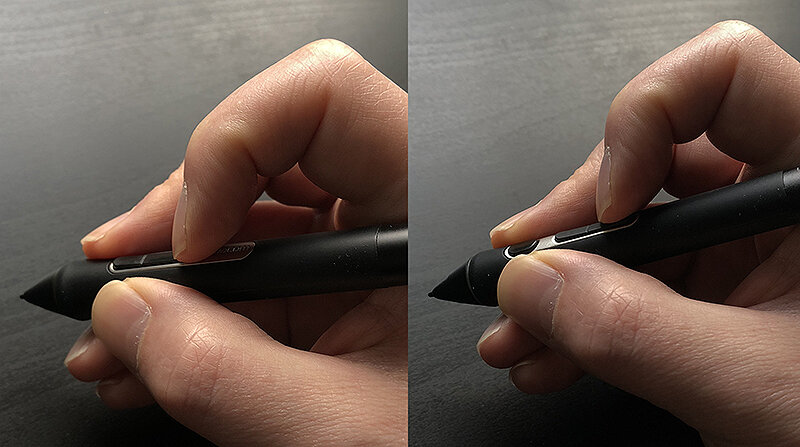
Do keep in mind however that we all hold our pens differently, so I might have smaller hands than you, or place my fingers differently, so you may find reaching the third button easier than me.
As far as the pressure and the feeling of the pen as its moves across the screen, these are identical the Pro Pen 2 and just as good. Just to recap there are 8192 levels of sensitivity available to you as well as full tilt control too.
One thing to note is compatibility. Unfortunately, the new pen will only work with newer devices, like the MobileStudio Pro, Intuos Pro and the Cintiq Pro line. It won’t work on the Cintiq 27QHD.
Digital Art Use
As well as a general look at how the pen feels I thought I would also write a summary of my experiences with some of today’s art applications. I am still experimenting with the configuration in a lot of these, so the following comments are work in progress.
Photoshop CC
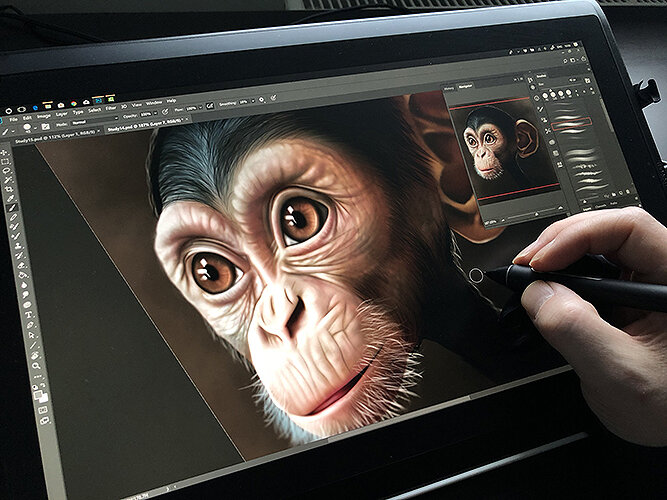
I have been using Photoshop more and more with the MobileStudio Pro, simply because I prefer it to painting on the Cintiq 27QHD, so it made sense to begin here.
As suspected the pen felt great but I didn’t feel the need to use the new button initially. I did configure it to be my Alt button rather than using the express keys, so I could access the eye dropper slightly faster. To be honest though, this is just how it was set up on the Pro Pen 2.
I did consider using the buttons to help navigate my canvas but with the touch controls its easier and more intuitive to move it around yourself.
To be fair I wasn’t expecting any major changes with Photoshop as the Pro Pen 3D is more geared towards 3D applications, as the name suggests.
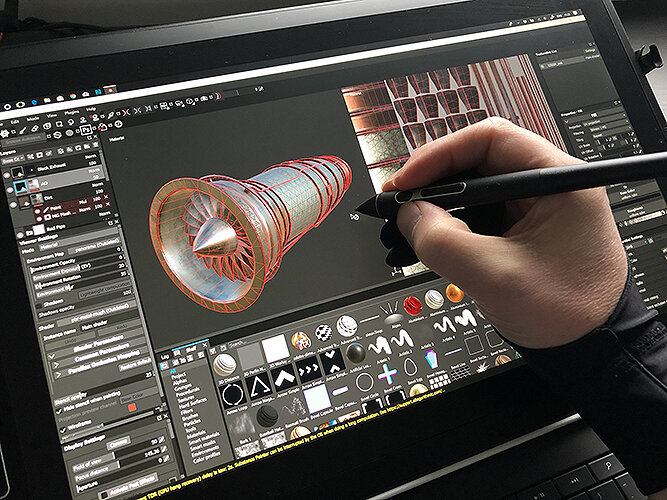
Maya

Now onto 3D and what the pen was designed for and I had a few ideas on how to configure the Pro Pen 3D with Maya to help speed up my work flow. By default, the buttons are configured to emulate Solidworks navigation controls as they are most widely used.
So, working your way from the tip, you have Tumble, Pan/Zoom and Right Click.These didn’t work for me. The zoom element was clunky and only worked when moving the pen vertically. I instead set them to Middle Click and Right Click, as I did with the Pro Pen 2 but the third higher button is now used to combine Shift, Control and Right click to bring up one of the context sensitive marking menus. In this instance its easier to press this one button on the pen that try and press two express keys.
I decided on this configuration because I am already comfortable with working with Alt as an express key, so I can quickly toggle Alt and then use the buttons on the pen to navigate in a much better way.To be honest I am still experimenting with the best option for the third button, but I am finding that I am using it more and bringing it into my workflow. The problem with Maya is its still a keyboard heavy application so you won’t be replacing it with the Pro Pen 3D. What it does give you is an additional convenient button to assign a common task to, which will save time in the long run.
ZBrush
This is where I felt the Pro Pen 3D really came into its own. Previously I had my pen setup with Alt and Space on the buttons, so I could navigate the scene, invert my stroke and get quick access to brush size etc. through the quick window.With the Pro Pen 3D I assigned the extra button to “b” to bring up the brushes panel which actually saved me a lot of time. I know it seems silly as you could just move up to the brushes button but there is a physical disconnect from what you’re working on. You break concentration to find the button and then select a brush.
I found moving it to the pen was less distracting and I could keep focused.
Substance Painter
The last of the main applications I wanted to test as I use this more now to texture my models than anything else. I though this would be an ideal test for the pen as it’s a combination of 3D and painting.Again, the default configuration wasn’t working for me, so I adopted a similar one to Maya being Middle Click and Right Click but changing the third button to Shift + Right Click to adjust the lighting in the scene. Something I do often to check the model and textures.So again, this did help to speed up my workflow, even in a small way.
Should You Invest?
Its always difficult to recommend a device which is so personal to the user. Everyone needs their pen to work in a different way and to be configured how they want it so what’s good for one artist may not be for another.
I was initially sceptical about the Pro Pen 3D. I already use the Express Keys to access most of my tasks so didn’t feel like I needed an extra button to help me navigate in 3D. However, what I discovered was a device I didn’t realise I needed until I had one. It’s a device you must invest in, not just with money but time.
It’s so much more comfortable to hold than the Pro Pen 2 but when you first use it you may not like it. You need to give it time to grow on you, to settle into your workflow and become a part of the routine. You will also need to experiment with the ideal configuration for you.
So, should you upgrade?
I would say if you’re a 2D artist then maybe not, well, not unless you want that extra comfort and feel the need for an extra button. What if you’re a 3D artist? This is a tough one…£90 is a lot to spend if you are already happy with the Pro Pen 2.
If you primarily work with a device like the MobileStudio Pro each day then I think it’s an upgrade you should invest in. Initially it won’t feel like its worth the expense but gradually, over time you could find it becomes an essential part of your tool-set.
Although Wacom supplied the device for me to test, the opinions offered in this review are my own.