Four Joint IK Chain

When it comes to animation, inverse kinematics, or IK as its more widely known, is a huge time saver. Being able to move a character’s hips while the feet stay planted, or keeping its hand steady on the balustrade as it ascends the stairs not only makes an animators life easier it can also help to produce more believable movements quickly and efficiently.
IK allows the animator this freedom because unlike FK, (forward kinematics), the joints are evaluated in reverse. So, with FK you would move the hip, then the knee and finally the foot whereas with IK the foot is evaluated first so the chain works backwards. Imagine trying to create a walk cycle using only FK and keeping the feet locked to the ground. Not impossible but still not an easy task.
Traditionally, IK works best with a simple three joint chain where the solver calculates the rotation of each joint in the chain. What is less known is that you can use more joints and the IK solver will try to adapt. If you increase this to four joints the solver will work if the angles of each joint are great enough. Try to use more than four and the chain breaks down, so the joints in the middle either don’t get evaluated or don’t rotate correctly.
So, what’s the solution if you need to use more than four joints?
Yes, you could use an IK spline solver but this is very specific to the type of chain you are using it on, so wouldn’t work on anything that has a distinct bend, like a knee or elbow. Luckily there is another option.
Hidden away in the deep recesses of Maya’s libraries is another IK solver, the Spring Solver. Once loaded, this secret solver will appear in the IK Handle options and can be applied just as you would with any other IK handle.
On first appearances it will look the same except the key difference here is that it is specifically designed to work with longer joint chains. What it does is keep the angles between the joints proportional, to ensure they are distributed evenly.
Let’s have a look at how to create and edit one.

You may be wondering where to find the IK spring solver. As mentioned, the option isn’t readily available under the IK Handle tools, so you will need to load it first.
To do this simply execute the following code in the script editor – ikSpringSolver – Simple as that. You will now see the ikSpringSolver option under the Current Solver drop down box inside the IK Handle tool settings.

You can now build your joint chain as you would normally. To help illustrate the difference between the spring solver and the standard solvers, temporarily duplicate the skeleton and move it to one side.
On the left apply the standard rotate-plane solver and on the right, create a spring solver.
If you now raise both IK handles you will see a clear difference. The spring solver has done a better job of distributing the joints.

At this stage you could leave the solver in its default state but there are more options for you to play with. If you select the spring solvers IK handle and open the attribute editor you will notice that a series of new options are available under the IK Spring Solver Attributes tab.
The one we are interested in is the Spring Angle Bias.
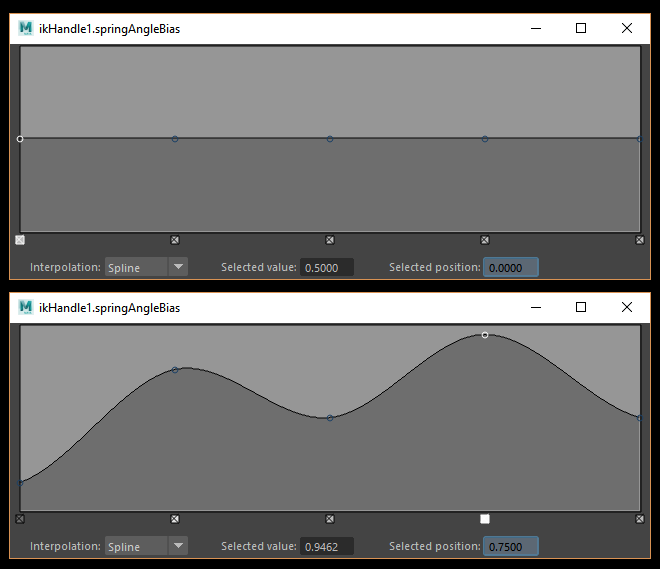
If you click on the large arrow next to the ramp a larger version will appear, making it easier to adjust. Editing this will alter the angle between the joints so you can make one section appear stiffer than another. Another option to give the animators yet more freedom to express themselves.
TOP TIP
If you are implementing this as part of a python script you won’t be able to use the “ikSpringSolver” command as this can only be activated using MEL. Instead you can use the following code to run a MEL command in Python, so in this case we can evaluate “ikSpringSolver”.
import maya.mel as mel
mel.eval("ikSpringSolver")
Reposted with permission from 3DWorld Magazine